Spotlight On: Custom Vinylmation Artist Crazy4Vinyls

Your mouth watered over his first set of M&M Vinylmation, now Crazy4Vinyls is back to continue his Pop Culture series with a set Pac-Man customs.

The set comes with Pac-Man and four different colored ghosts. It is available on eBay right now.

Crazy4Vinyls even makes his own artist cards to accompany his creations. Here is a peak “behind the scenes” at the making of this set.

Painting the heads
Painting the arms
Body Parts

Look for more of Crazy4Vinyls customs on his Facebook page.

Spotlight On: Custom Vinylmation Artist Kevin Graham

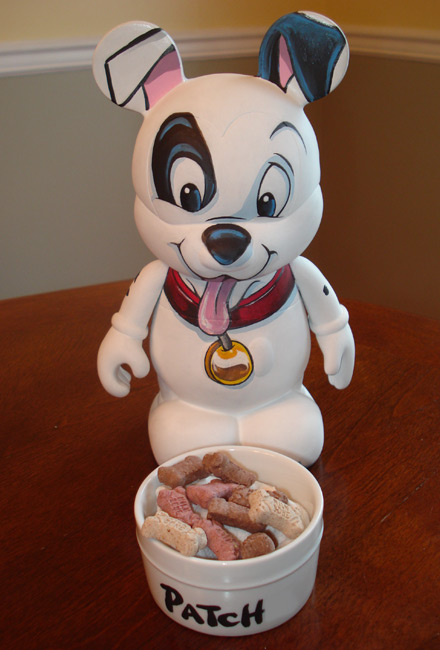
When Rhode Island artist Kevin Graham emailed us his 9″ Patch custom, we were very impressed. When we looked over his website and resume, we were blown away.

Destination Vinylmation: You have had a great career creating some work that our readers may be familiar with. Tell us a little about what you do.
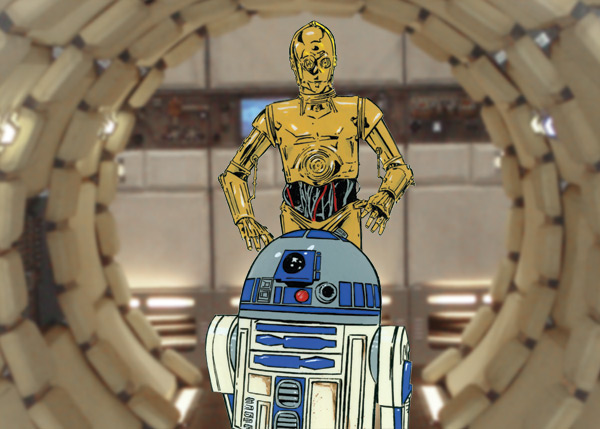
Kevin Graham: I own my own Graphic Design/Web Design company. Usually during the day I do work for my main company and in the evenings and weekends I freelance doing work for Lucasfilm/Star Wars, Topps, Upper Deck, and many other companies. I am most known for my Star Wars artwork. I have a series of Star Wars licensed artwork you can currently find on Zazzle.com and at your local Old Navy and oldnavy.com. Topps has several Star Wars trading card sets they come out with each year. Star Wars Galaxy 7 is the most recent. I did 9 paintings that are in the current set that can Only be found in retail stores like Target. I have been a huge fan of Disney animation so I created 9 hand drawn animation cel paintings.

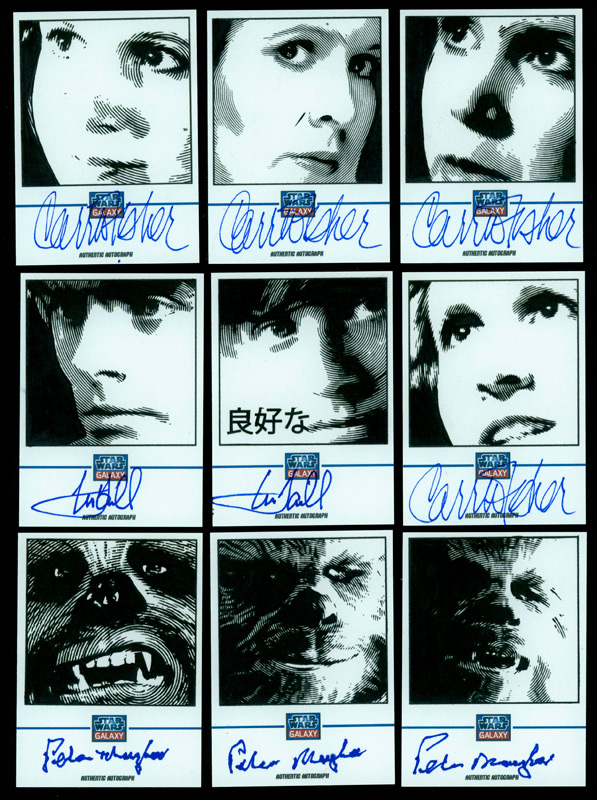
The cards are printed on clear plastic. Topps also gives us blank cards for us to draw whatever we want on them and then they are randomly inserted into packs of cards.

I did 50 cards for the Hobby packs found Only in hobby stores. They also had the actors of Star Wars sign the blank cards and then we draw them.

I also raise two kids and have a second one on the way in about a week.

DV: You obviously have a love of Star Wars, can you share some of your favorite Star Wars related work with us.
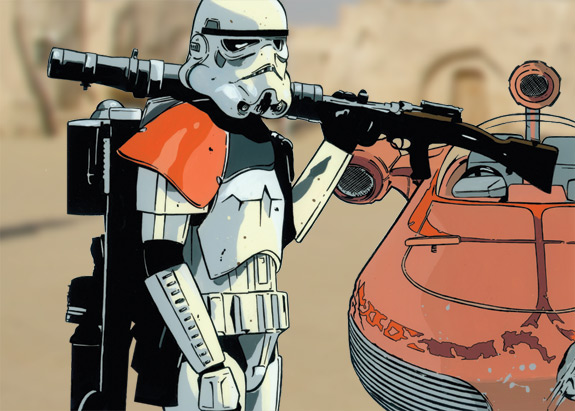
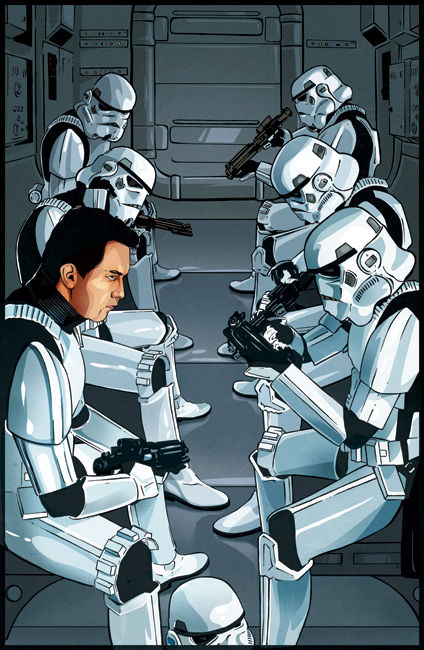
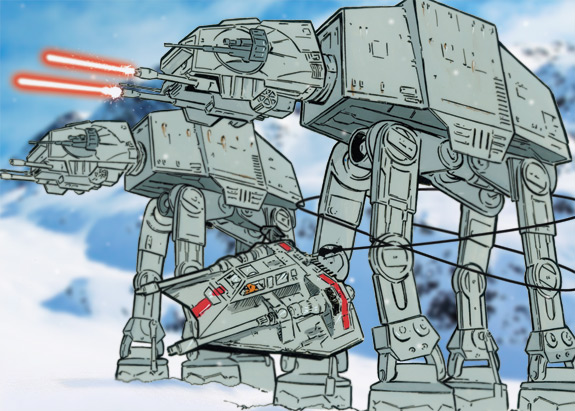
KG: It’s hard for me to really pick a favorite piece of mine. The amazing thing is since 2006 when I started doing sketch cards for Topps, etc. I have drawn over 10,000 sketch cards. I cant even remember most of them. Star Wars related I’d have to say I really liked the base card I did for Topps Star Wars Galaxy 6 last year. The reason why is I drew 6 Stormtroopers and one has his helmet off, its me.

Actually all the Stormtroopers are me as I own my own Stormtrooper costume but was cool to be able to have myself as a Star Wars character on an official Star Wars card. Another piece I really like is the limited Star Wars print I did for Star Wars Celebration 5 in Orlando last year. I was one of only 50 artist selected to be part of the event. The print was limited to 250. The original artwork for both is now owned by Lucasfilm.

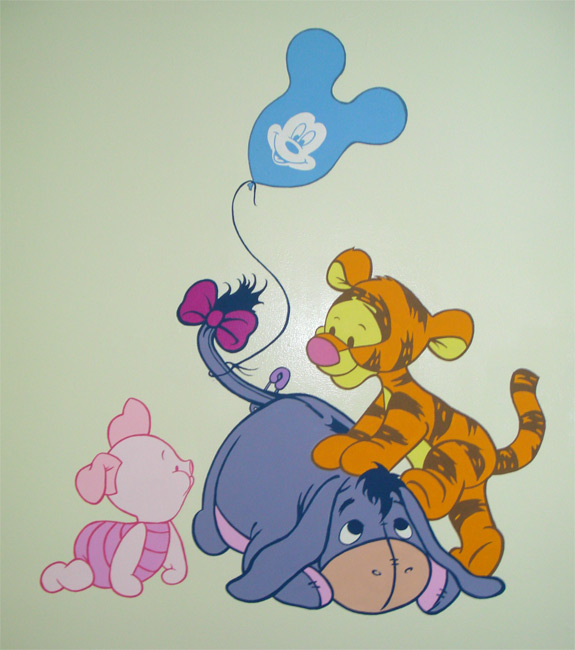
My favorite non Star Wars art piece I love is the Winnie the Pooh mural I did in my babies room recently.

DV: Let’s talk Vinylmation. As a Star Wars fan, what are your thoughts on Series One that was released last year? Do you own any of these figures?
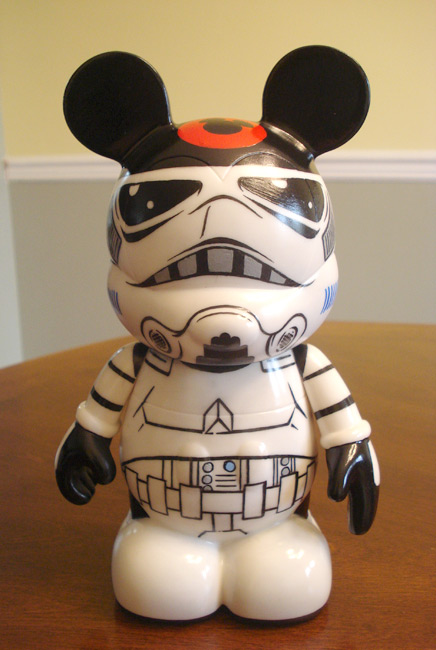
KG: To be honest I was expecting them to be better. No offense to the artist or Disney but of all the good artists out there, Including Star Wars artists (Wink, Wink) they could have been done much better. I actually looked into doing Star Wars Vinylmations way before they came out. I tried contacting the people in charge of licensing for Disney/Star Wars but they only use official Disney artists. To bad. I do have the entire set except Obi-Won ghost which I don’t think I’ll ever get. My favorite of the set would be the Stormtrooper 🙂 I did a 9″ Stormtrooper before the set came out, It was done as a gift for someone.

DV: Have you seen the concept art yet for the couple of known figures for Series Two yet? What are you thoughts on the designs?
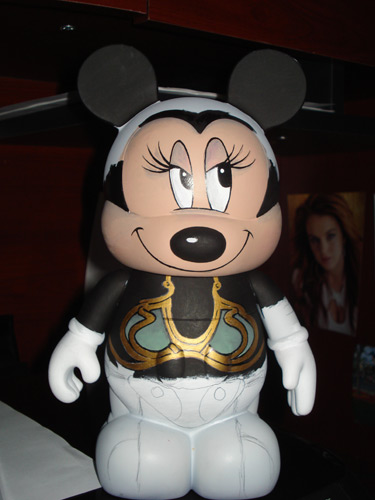
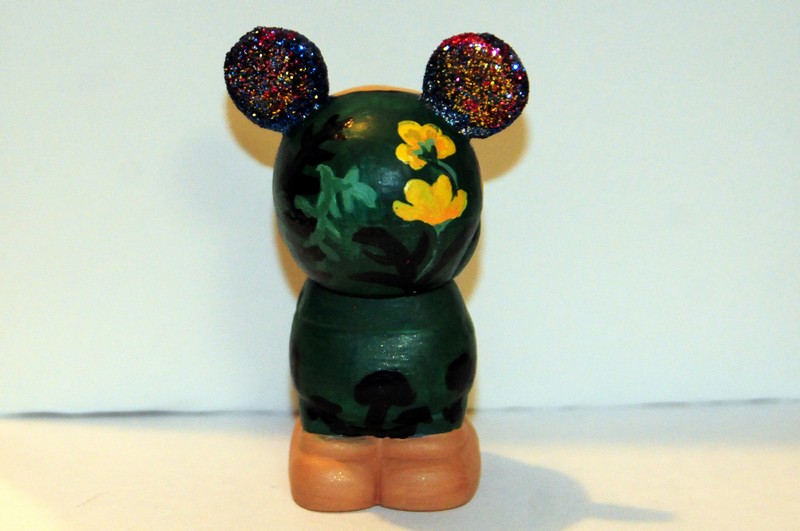
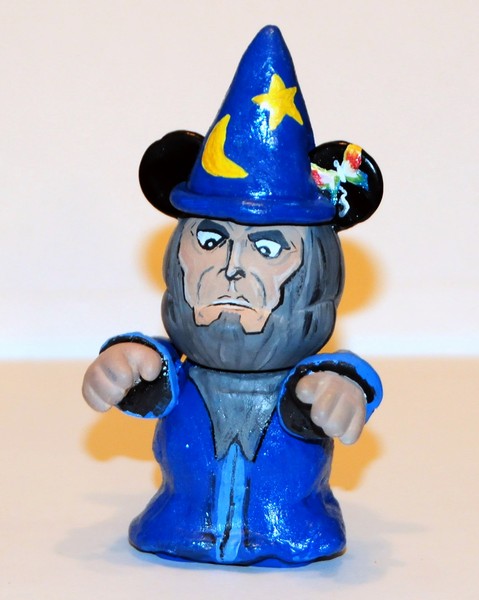
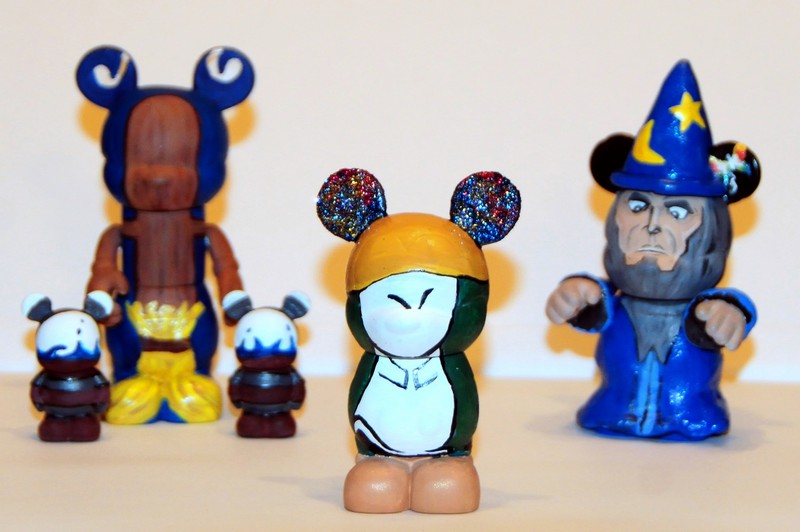
KG: I did see a few. I am pretty happy with them. I really like the Disney characters dressed as Star Wars people. Since I am both a huge Star Wars fan and Disney I like the mashups. I have been working on several of my own Star Wars /Disney vinylmations. One being Minnie as Slave Leia.

I wasn’t sure if Disney will attempt one so I figured I would. I hope to have it completed soon.

DV: Series Two is based on A New Hope. Do you have any speculation as to the rest of the character line up?
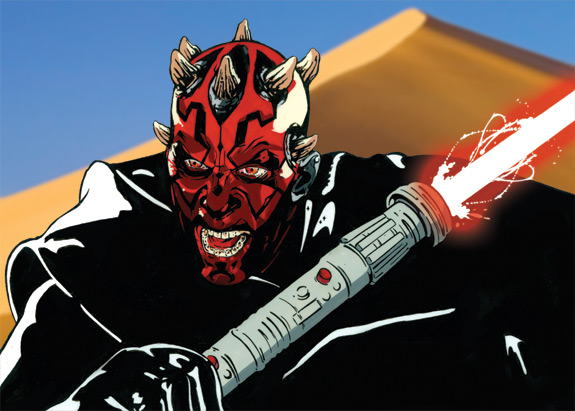
KG: Unfortunately I don’t get to follow all the chatter online as I am always drawing almost 24 hours a day but I hope the series continues to get better. There is so much you can do with the technology/printing they have available I don’t see why they don’t just go nuts with detail, accessories, etc. Maybe Darth Maul with actual horns or sabers that actually light up, etc.

You have all the technology and some of the best artists around, go nuts 🙂 I know I would and do.

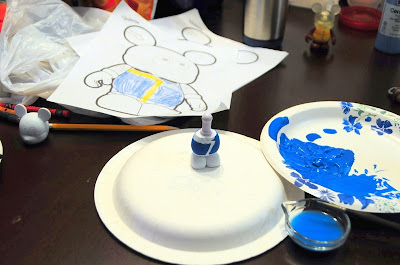
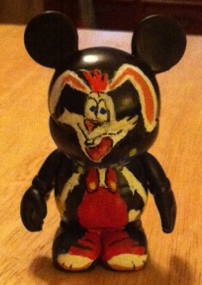
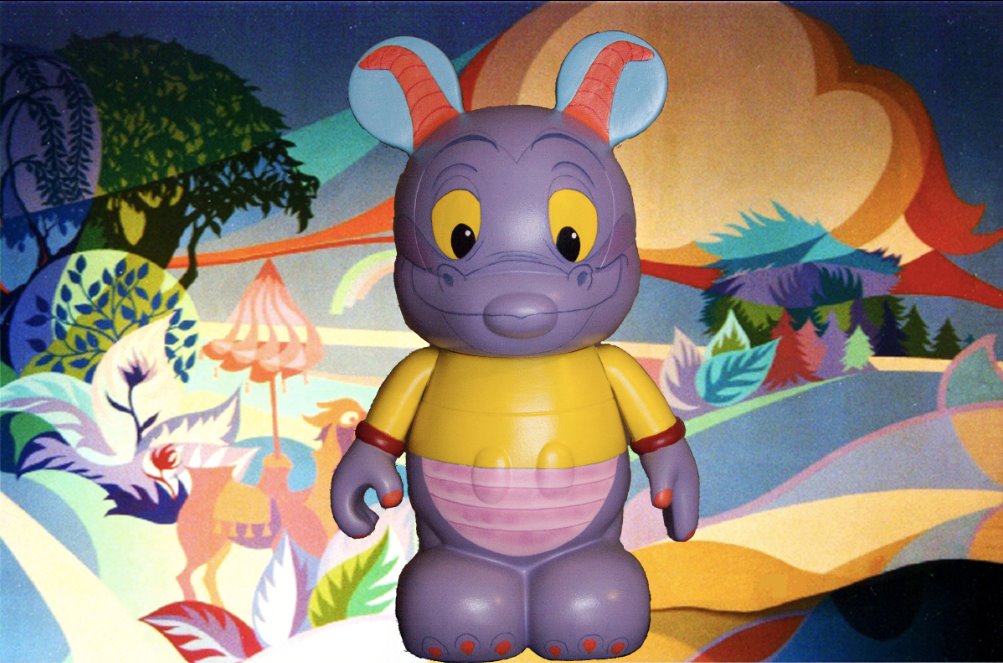
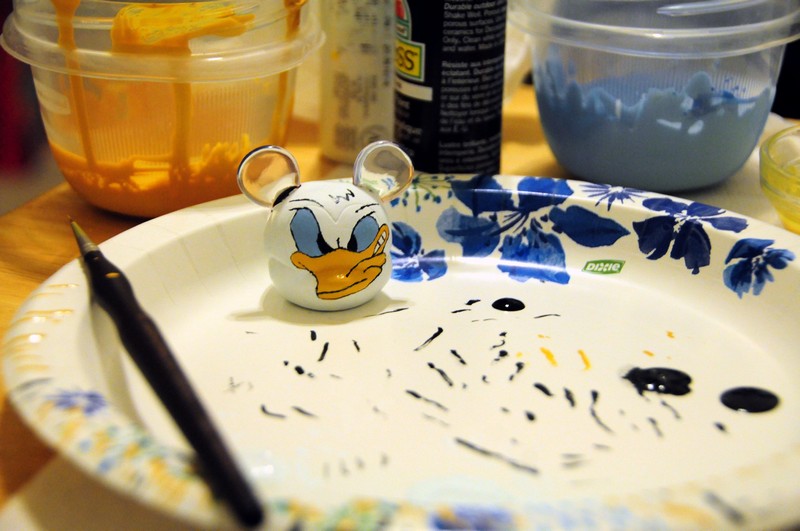
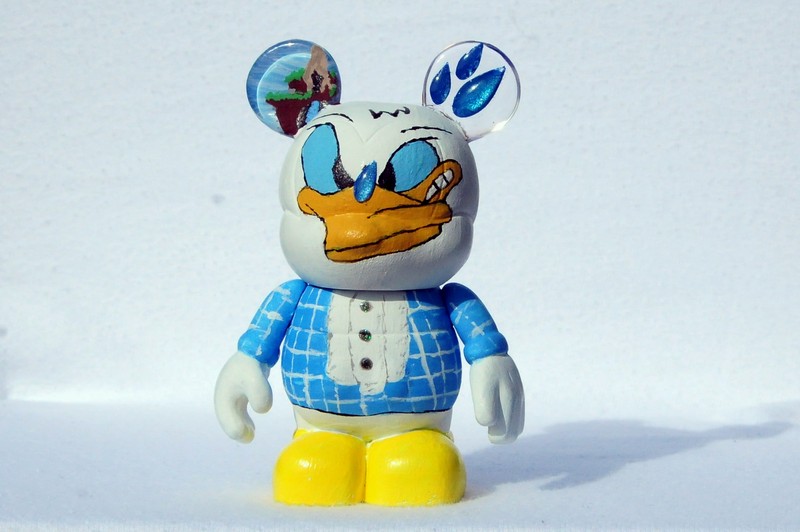
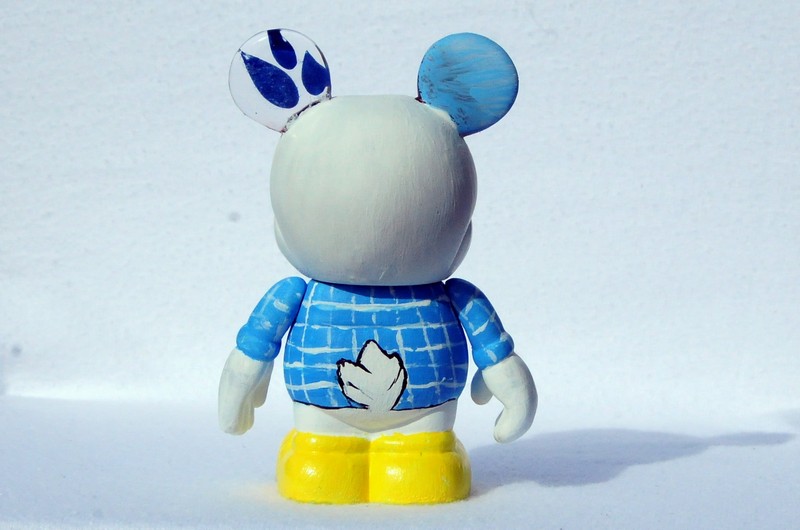
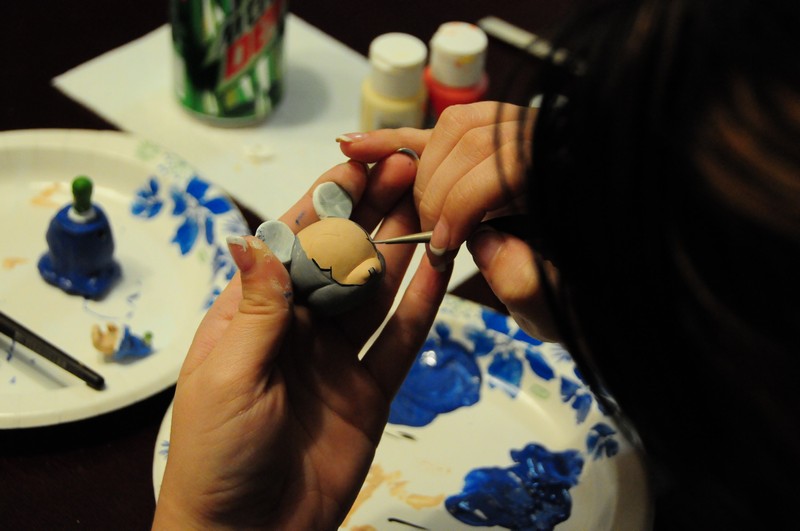
DV: Your patch custom is great. I really like all the shading detail. Why did you choose Patch?
KG: I was originally looking for artwork to draw for my upcoming baby and found a cute picture of Patch. The odd thing was I actually started my Patch before the Furry Friends came out. Apparently the Disney artist used the same image as reference as me to do the artwork. I think mine is more detailed, I just don’t have the bent paws 🙂 Which if I had time I would make custom ones for 9″ figures.

I also thought it would be cute to add a dog bowl with his name on it. He was a blast to work on. I enjoyed it so much I did another Dalmatian right after it.

DV: What was the hardest part about creating Patch?
KG: I know a lot of people hate the new molds and I agree for the most part as I love the nose being there and buttons. The thing is when you are actually drawing and painting on them the nose becomes a problem. Especially when drawing peoples lips on the nose area. You may have seen other people who have done customs put lips on the nose and it looks like they had botox injections 🙂 Its rather hard to get around this unless you can work the design a little to correct for this issue. In this case it would be great to have a new 9″ mold without the nose there. For doing Vinylmations of people anyways. The nose can also create odd shadows that mess with the design.

DV: Do you have anymore figures planned?
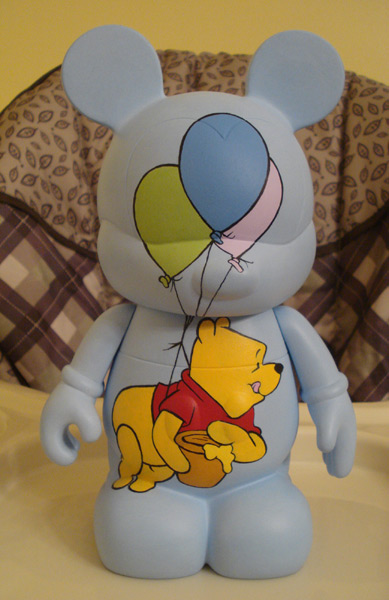
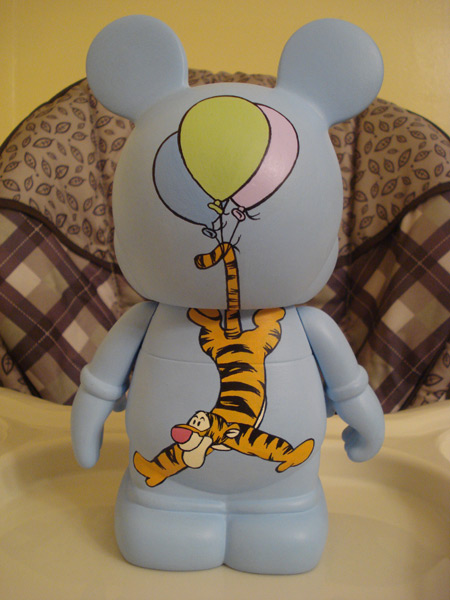
KG: I have a ton of Vinylmations planned and some new Disney and Star Wars Canvas paintings . I currently have about 6 Vinylmation commissions in the works. I have to multi task or I go nuts and don’t feel I am doing enough to keep busy. When Vinylmations first came out I started doing custom figures with the 3″ Vinylmations since the 9″ were so expensive. That was until the odd colored 9″ ones started to go on sale. All you need is white primer and your good to go. I love doing work for charities. Before Vinylmations came out I did other custom figures, Stormtrooper helmets, etc. for Make-A-Wish, etc. to help children and others. I am currently working on a Vinylmation for Autism Awareness Light It Up Blue event for April 2nd, its world autism awareness day. The Vinylmation will be sold to help children with autism. Ill have more details soon. I have a lot of cool Vinylmations in the works or completed but I can’t show them all yet because they are gifts for people. I recently just finished a 9″ Vinylmation of Pooh and Tigger to give to my wife when our baby is born in a week or so.

I will add his name and birth date on the balloons.

DV: Where can people go to view your work?
KG: You can see my work at www.kevingrahamart.com or ask to be my friend on Facebook (www.facebook.com/Grahamart ) which usually is updated way more than my regular site. Unfortunately I havent had time to make a Fan page for myself on Facebook. Commissions are always welcome on Vinylmations, canvas, etc. I appreciate every one’s interest in my work. I also plan to start doing Live video cast showing me working on Vinylmations and other art related projects. I will be showing different techniques etc to help others interested in doing Vinylmations. Ill have that info posted on my website and facebook.

Spotlight On: Custom Pumpkin Artist Gyophry

It’s January, so the thought on all our minds is of course… pumpkins! Last fall we featured artist Gyophry’s custom pumpkins. He masterfully carves works of art into these pumpkins and being a huge Disney fan, many of his designs lean that way. This year he is embarking on a series of pumpkins that will pay tribute to the Disney theme parks.

I am attempting what could be my most ambitious series yet, and the 1st of this is the Epcot 30th anniversary.
This is special to me due to Epcot being the 1st Disney park i had the pleasure to visit way back in 1982. I wanted to do something that would also bring back memories for a lot of us fans.

I began by finding a pattern series and then outlining the design in a pencil, it is difficult to see most detail when taking the paper pattern and laying it on a round 3d surface. I then painstakingly use a pin tool to pierce the pattern to the pumpkin, this allows me to remove the paper to see the design better, this process took me approximately 4 hours to complete.

Then the fun part, its time to cut and carve. This is the most exciting and nerve racking point in the process. Any mistake and its all over, as you can see the amount of time taken on the prep allows for the fine line detail. Slowly but surely the final design starts to show up.

The carving all in all took  approximately 6 hours to complete, and other than some issues with the paint of the actual Funkin (brand of pumpkin), I feel like this was a great start to this series.

If you are wondering what the rest of the series will be….well all i can say is its like Park Starz in the way it honors the classic rides and attractions we all love and cherish. I look forward to keeping you and the rest of my Vinylmation fans in the Halloween spirit all year round.

Spotlight On: Custom Pumpkin Artist Gyophry

Here are a couple of shots from my disney classic series:

The epcot 30th was the 1st of the series.

20K under the sea is #2

The classic poster from the Jungle cruise is #3

I have been experimenting with new media for #4 “TomorrowLand”

Now that the season is upon us I hope to have many more awesome designs created. All of the classic series are available for purchase. $75 shipped. Thanks for allowing me a chance to share with the readers.

Gyophry can be contacted about purchasing his pumpkin creations via his Twitter: @gyophry.

Spotlight On: Custom Vinylmation Artist April Skyy

Destination Vinylmation: You just designed a line of custom Vinylmation specifically for Valentine’s Day. Tell us what makes this concept so unique?
April Skyy: You can send your special someone a custom Divine Valentine Vinylmation to show how much you care. Customize the Vinylmation with a date, nickname, or initials to commemorate the occasion. Allow me to send the Vinylmation directly to your special someone and you can decide how to reveal your identity. Remain anonymous or I will include a Valentine with your name inside the package. Items can be shipped quickly or sent to arrive the week of Valentines Day.

DV: Where on the vinyl does the personalized message go?
April: The customization you choose will be revealed when the vinylmation is turned around, on the back of the head.

DV: What colors do the customers get to choose from?
April: Crush- Pink and Purple, Fantasy- Blue & Silver, Bestie- Purple and Pearl White, Love- Red and Pearl White.

DV: How did you come up with this idea?
April: When I was in school, I used to help deliver roses to other students. Each color of rose symbolized something, just like the Divine Valentine Vinylmations.

DV: Do you have plans for other holiday specific Vinylmation?
April: Yes, I am creating even more Valentine Vinylmation customs and look for more holiday creations in the future.

DV: What is the price and how does someone order one?
April: $45 each with free shipping for all orders placed by January 25, 2012. All orders placed after January 26th will be $50 each with free shipping. Please contact me for shipping prices if you are outside the USA. Order by February 5th for delivery by Valentines Day.
Place your order by contacting me through Facebook:
http://www.facebook.com/pages/April-Skyy-Art/328749133807869

Spotlight On: Custom Vinylmation Artist Nick

After Santa Donald, the second custom in my planned line of Donald Ducks was Star Tours Donald.

I always start with the body. Mostly because I avoid doing the head as long as possible.

That was my first sketch of a face outline onto the canvas. One thing i learned quickly was how difficult it is to translate a 2D drawing to a 3D mold.

It sometimes takes a few tries to be satisfied with the outline and don’t be afraid to redesign a few times in the process so it looks best instead of trying to force anything.

There he is without some of the facial details.

After getting the face done, I started on the ears. My idea for Star Tours Donald was he is a Cast Member that is a bit worried as he looks up to the sky and notices a Star Speeder 1000 (the vehicle the guests travel in) heading right toward the Death Star. I actually painted over that Death Star. So hard to get little details down that at my current talent level I have to kind of stylize it instead.

The final version. I’m very happy with the final version. The Star Speeder also took a couple tries as I learned to take out details. It is soooooo small. So the lines are not as straight as I really wanted. I like the detail on this Death Star over the previous picture, the lines and colors make more sense. I am extremely happy with the way I can draw Donald’s face. The costume was fun and well represents the real one. I did struggle with two things; the shoulder patches and name tag. I decided in the end that the patches would clutter the body and the detail was so small on them. I practiced and decided that if I couldn’t make them look great, he was better without them. The name tag was also omitted as to not clutter the front. I also found it hard to make it look right.

As with my previous custom, I painted along side my friend Rachel who is creating a Fantasia set. She started with the Mop and Buckets and I have an update. She originally made the buckets out of clay, but has since did a redesign and used Juniors to represent the buckets!

It was a great idea that was well executed.

This time around, she made a Low Hop.

Remember I talked about the struggle to translate a 2D drawing to a 3D mold? She went back and forth with the decision to stretch Low Hop over the whole mold and wrap him around. She eventually decided against this and just painted him onto the front. One of the big factors was the foot flopping up looked best this way and that is an important feature. But then the problem of what to put on the back.

She decided on a scene we see in the movie with grass and flowers and the silhouettes of the mushrooms in the foreground. She also added multi-colored glitter to the ears to represent the dust at the beginning of scene that falls from the sky.

Spotlight On: Custom Vinylmation Artist Shannyn

Shannyn sent us in some more customs. This time she focuses on the Disney ducks.

First, a great looking Donald and Daisy painted on the front of this colorful canvas. It even has hearts stuck onto the head and ear.

The back shows a love letter from Donald to his sweetheart.

Then she made a 3″ set of nephews. Each one individualized with their colors, different facial expression and varying ear designs.

I have always struggled with my duck tails and all three of my customs have a different style. I really like the way Shannyn approached the tail and might give it a shot myself. Great work Shannyn!

Spotlight On: Custom Vinylmation Artist Nathan

Custom artist Nathan resides in FT Worth, Texas is the subject of our spotlight today. Classic Disney characters old and new were the subjects of his latest creations.

Destination Vinylmation: Were you into creating artwork before custom Vinylmation?
Nathan: Why yes. I’m a professional Graphic Designer and have been into different styles and medium of art from an early age.

DV: You decided to paint Roger Rabbit smaller and onto the front instead of stretching him and wrapping him around. Was that always the plan? Why did you decided to paint him that way?
Nathan: I decided to not make him fat! Most artists use the whole VM and stretch out the character so I wanted to try something a little different. I really like the way he turned out, though his mouth gave me a huge struggle being on Mickey’s nose and still doesn’t look quite right. I know a lot of people think I should have used all the space, but I chose a different path and experimented! That is the great thing about being an artist, having your own vision and going with it. With him being my first custom and painting on a 3D canvas I gained a new appreciation for all the custom and Disney Artists.

DV: Agent P looks great. Was it difficult to capture this character onto the mold?
Nathan: Agent P was my second custom and was not as hard as Roger was for me. I used a lot more of the vinyl, but not all of it. I wanted to capture his legs and feet from the front and back. I also enjoyed making the hat instead of just painting it on. I made Agent P for my 4 year old son who love Phineas and Ferb. I admit I do too, shhh don’t tell anyone it will be our little secret!!!

DV: Can you give some tips on molding a hat to fit onto a Vinylmation around the ears?
Nathan: The hat was a fun little aspect of the process. I used an air dry sculpting clay for it. I made the rim of the hat first and cut slots for the ears and test fitted til it was a nice snug fit all around the ears. Then I molded the main part of the hat, attached and molded it to the rim. The hat is actually attached to his head as I molded it right on there. Once it was completely dry I painted it to complete Agent P.

DV: Do you sell your work?
Nathan: I just started with customs so I really haven’t thought about selling them but you never can tell what will happen in the future.

DV: Where can people go to see more of your work and contact you?
Nathan: I don’t have any of my customs or regular art online, but I do have my freelance Graphic Design website up and it is: http://mysite.verizon.net/res14m94x/index.html

DV: Thank you for sharing your work with our audience.
Nathan: I appreciate you taking the to look at my customs! This hobby has been a lot of fun collecting and now doing customs just adds a whole new dimension to it!! And as Nick an M.C. say “Keep on collecting!”

Spotlight On: Custom Vinylmation Artists Nick and Rachel

I just finished my third Vinylmation custom figure and the second in my Donald Duck Cast Member series. It’s great to see more and more of you out there picking up a paint brush and giving it a go at your own creations. It is daunting at first, and I had the fortune of having a friend who had all the paints and brushes I needed, but it can be a lot of fun and you never know what you can really do until you do it. I’m not saying I have any real skill yet, but I hope I am showing some improvement along the way.

The Donald I chose to create this time is a Splash Mountain Cast Member. Splash is one of my all-time favorite rides and has a unique and identifiable costume. I started with a light blue base all around the body.

I then layered over that with the white bib on the front and the cross hatching of white to create the checkered effect. I found this very difficult for my skill level to get even in anyway. So I found the best effect I can do would be a more “sketchy” type line. When I tried to draw a more perfect line, it came out too messy. I also make this work in my head by telling myself it’s fabric and it bends and folds and isn’t perfect anyway.

As you can see, I also used a clear eared vinyl. This is because I will be painting the outline of Splash Mountain in one ear with a sky behind it and water splashes in the other ear. I decided clear ears would give this an added effect.

As you know, Donald’s signature is that he gets angry. So Splash Mountain is perfect because, well you get wet. So Donald is angry here because he is being splashed.

For the “splash” I used a few clear, “puffed out” rain drop stickers. I painted the backs with a peal blue and they sprayed an adhesive on after they dried. Note: be careful with spray adhesive. We had a slight production delay when I sprayed my fingers together.

Here is a look at the finished effect of the splash in one ear, with one drop landing on his nose, and the mountain in the other ear. Honestly, the drop on the nose and even how to go about the water effect, came after the figure was almost done. The ear and head splashes were going to be paint. Then possibly hot glue gun drops painted. But these stickers provided the most polished effect for me.

My favorite part of this figure has to be the tiny Splash Mountain in the right ear. I modeled it after the classic attraction poster that is drawn like a cartoon instead of a picture of the real attraction. I am proud of how I fit the top two levels on and the tree with the little bit of detail work in it. And my effect worked as planned. By painting the mountain on the front of the clear ear and the blue sky behind it, it gives a little depth of field. The sky was not planed to have the cloud effect, but when I applied the paint and saw it, I was impressed. Some things just happen by accident and work out for the best.

The complete finished figure from the front.

And the back. Now of course, I’m not the only one painting a series of figures. Let’s check in on Rachel’s progress with her Fantasia set.

Here next figure is a very ambitious one, Yensid. As you can see, she began with a Toy Story Rex figure and molded a robe out of clay.

She applied blue paint to the body and arms and white to the head.

Then, with paint, she carefully drew the frame of Yensid’s face.

Steadily, and with much attention to detail from the film, she applied his facial features.

Yensid’s face was nearly complete, but his ears and head still needed some final touches.

She sculpted a hat to place upon his head and painted in the colorful butterfly Yensid conjures up in the film.

The finished Yensid has magnificent detail in his face. The robe has a beautiful flow to it. And the hat and robe were finished off with a slight sparkle in the paint.

Yensid now joins his fellow Fantasia creations.